If you spend any amount of time caring for and pruning in your garden, it will pretty quickly come to your attention that your nice, shiny, sharp tools do not stay nice, shiny and sharp for a very long time. Тhey get blunt pretty quickly with use. If you are the sort of person who likes a tidy hedge, you’ll be out there doing frequent trimming. Аs a result of this, your hedge trimmer blades will get blunt. Does not matter whether you’re using a top-of-the-range model or a budget piece of equipment. Blunt blades create a lot of problems. First of all, they make the work you’re trying to do considerably harder and more time-consuming. Second also leaving you with a much messier finish. Due to this, it’s important to always sharpen your hedge trimmer blades as soon as they start to become blunt.

Sharpening Blades by Professionals
You can pay a professional to do it, or attempt it yourself at home if you feel confident.  If your machine begins snagging on the branches or cutting badly, you need to give the blades some care and attention. You may need to sharpen and clean your hedge trimmer blades quite regularly. First remove residual build-up from between the blades at the same time tuning up the blades themselves. This process, depends on how often you cut your hedges and what type of hedge you are cutting.
Sharpening Hedge Trimmer Blades By Yourself
Sharpening the blades yourself can be a good way to save a bit of money. Especially if it’s a job which you need to do regularly. It’s also something you can do in your spare time, rather than needing to drive to a professional and drop the hedge trimmer off, then collect it. There are lots of guides and videos online. So make sure you are familiarise yourself thoroughly with the relevant information for your make and model. You need to observe the proper safety routines too.
There is one unwritten rule. If you want to have the best hedge trimmer, you need to take good care of it.
Read more about Bosch Art 23 Sl How To Change Spool
Most importantly, always make sure that the trimmer is switched off. Moreover, make sure it is unplugged before you begin to work on the blades. Accidentally turning it on could be extremely dangerous and result in serious injuries. It is also important to wear gloves which will protect your hands if you slip – even blunt blades can cut you badly. Once you have begun sharpening them, you will certainly need protection. You are going to be working with your hands right next to the blades, so do take sensible precautions and use thick leather gloves.
If you are going to clean and sharpen cordless hedge trimmer, remove the battery! You can read more about this machines in our cordless hedge trimmer reviews section.
Sharpen Hedge Trimmer Blades Step by Step
Firstly, before you begin sharpening, it’s very important to make sure that the trimmer’s upper and lower blades are in correct position. They have to align with each other, so that you can access both. Do this by gently squeezing the blades together, ensuring that the top blades rest exactly over the lower ones. You can use the head of a screwdriver to get the alignment perfect. Of course, its only if you can’t do it with your hands.
Second, you will also need the proper sharpening equipment. Flat file and a sharpening stone, as well as a flat surface to place the blade on. First of all, check the manufacturer’s guide for specific instructions regarding the angle at which to file the blade. Afterwards take your file and begin working on the first blade tooth. You should hold your file at the same angle as the edge you are working on, sliding it downwards towards the point of the blade. The blades are made up of three cutting edges. There is one on each side and also one at the tip. So it’s important to work on all three by turn, making sure each is sharp. The edge of the blade should become shiny as it gets sharper. So it’s easy to tell whether the file is effective and whether you’re making progress.
Remember, your best hedge shears also need to be sharpen.
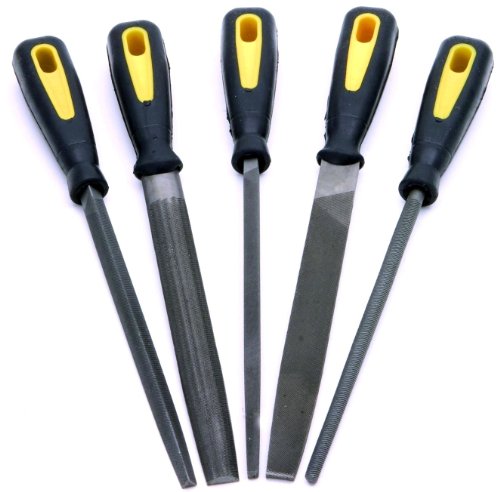
- Rubber cushion grips
- Set consists of flat, round, triangular, square, and half round file
- Ideal for shaping wood
- Length: 200 mm
- Yellow/Black Colours
Sharpen the Opposite Tooth
When you have finished one tooth, turn the trimmer the other way up. So you can begin working on the opposing blade tooth. It is important to work in this order. Blade is properly sharpened once the apex where the two blades meet forms a sharp cutting edge. This is why having the teeth aligned before you begin is essential. You will not be able to work if they are out of line with each other. As a result it will be impossible to tell whether you have achieve a razor edge. Once you finish the first set of teeth, move onto the second, and gradually work your way along the blades. It is quite a length process, but you will see a marked improvement.
Next you will want to use the sharpening stone. This tool works to remove any kinks or bumps in the metal. They may cause snagging and create an uneven cutting edge. These kinks will often be on the underside of the blades. So you will need to work carefully and thoroughly along the edges to ensure you remove them all, taking care not to hurt yourself. Getting rid of them is important. It keeps the mating surface between the opposing blades smooth and reduces the chance of them catching on each other.

- Precise and Sharp Cuts: Re-sharpens metal rotary mower blades quickly to the correct angle, restoring top cutting action in just minutes. There is also no need to remove the blade from the mower.
- Multi-Purpose: Re-edges and re-sharpens spades, hoes, lawn-edgers, axes and other garden tools and accessories, making them much easier and safer to use.
- Sharp as New: Reversible Corundum grinding wheel gives 10 mower blade resharpenings. Lasting for many seasons.
- Universal Fit: This sharpener fits any power drill, both corded and cordless, to get you working in no time.
- Maintain Your Lawn: Sharp blades give a clean cut and are healthier for the grass and safer for you to work with.
Cleaning and Lubricating
The following step is to take a damp rag and wipe down each blade carefully, removing any residue and leftover filings; while they are only small, they could clog up and damage the trimmer if you leave them on the blades. Getting rid of sap-build up, twig fragments, and anything else that has been caught between the blades is also important to the overall functionality of your hedge trimmer. Finally, give the blades a thorough spray with machine oil or a manufacturer-recommended lubricant to prevent rust and to keep them moving smoothly.
Sharpening your hedge trimmer blades can be quite a lengthy process. You have to work on each tooth individually, but it is a way to save money. If it’s a job you need doing regularly, and you will get faster and more efficient the more frequently you do it. As with most jobs, regular maintenance prevents it from becoming an overwhelming task. Therefore, keeping the blades clean and sharp will make the trimmer work better. Meaning your other task – the actual hedge trimming – is done as quickly and effectively as possible.